Call Us (903) 204-7571 Today

“Taught By Fathers, Trusted By Families”

Repair

HVAC technician checking system gauges during R410A refrigerant service
Air Conditioning, Commercial HVAC, HVAC Systems, Maintenance, Repair, Replacement

R410A Refrigerant: A Complete Guide

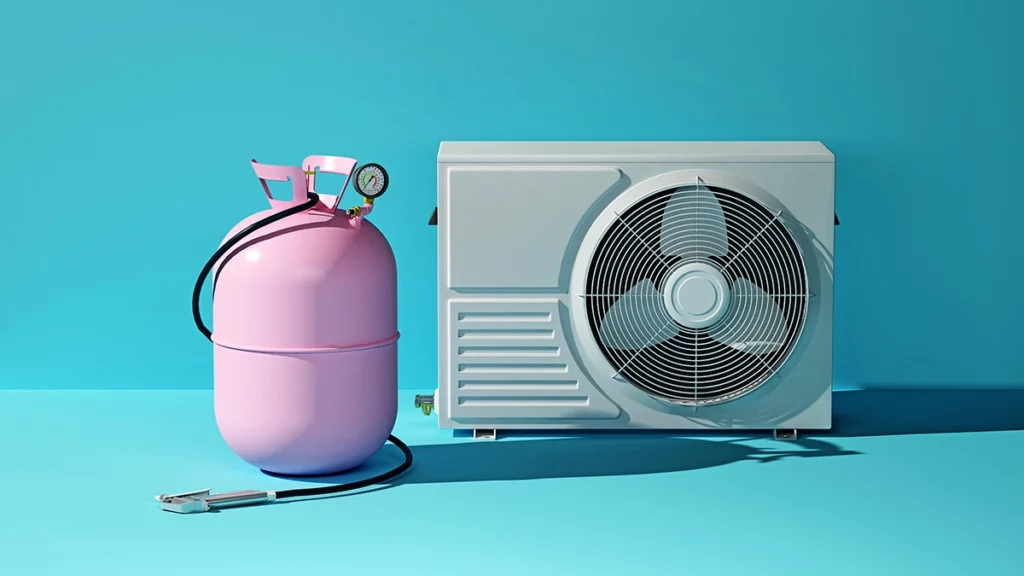
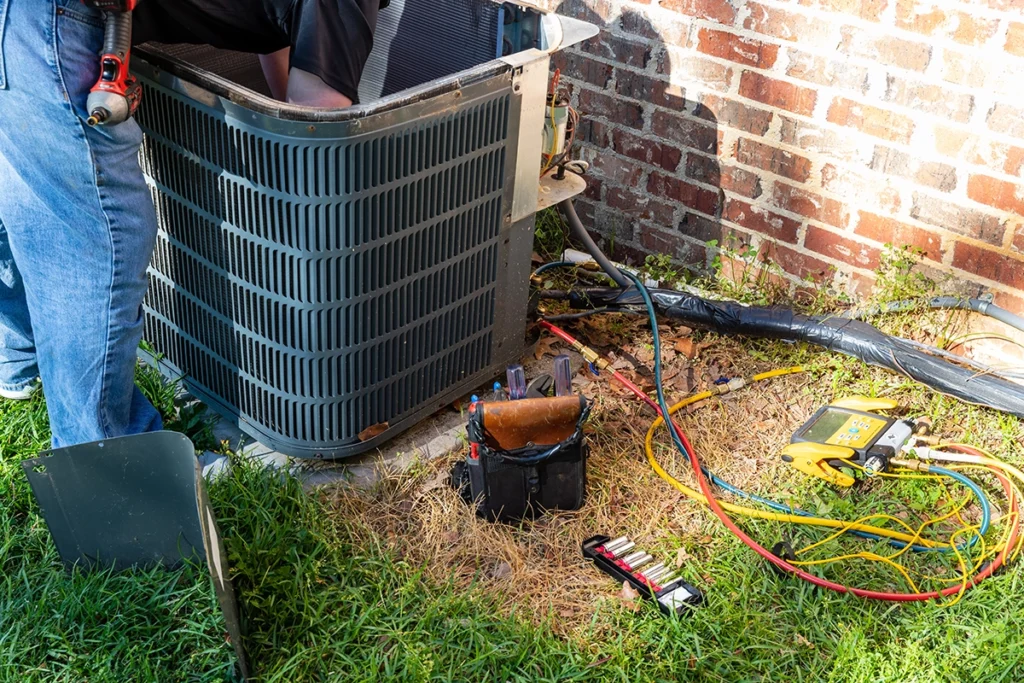
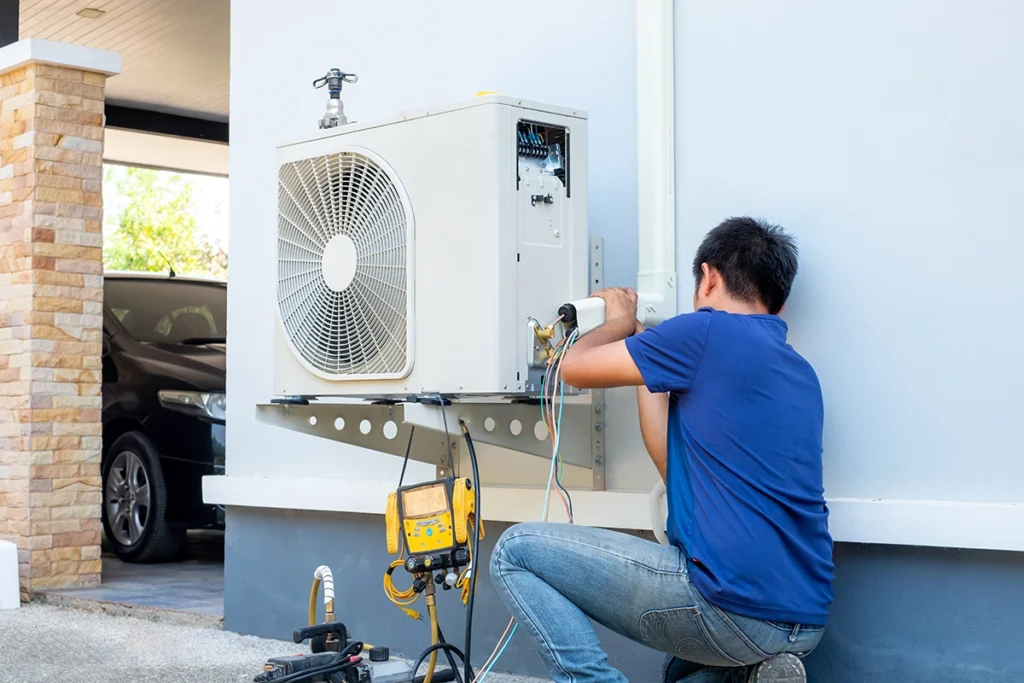
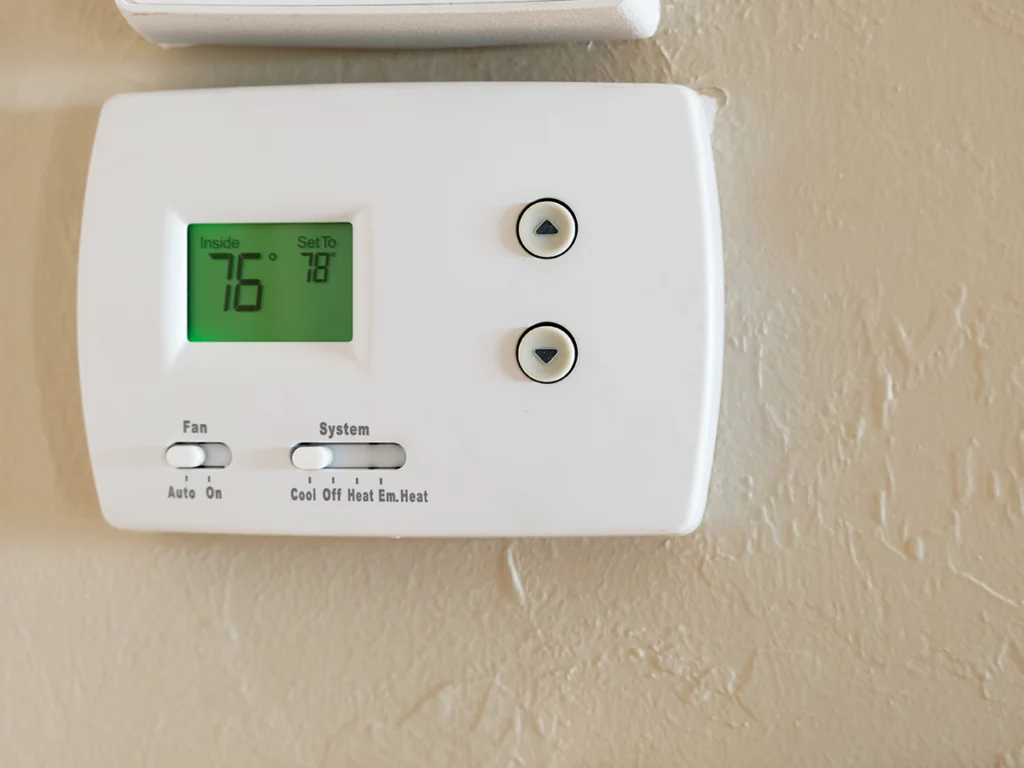
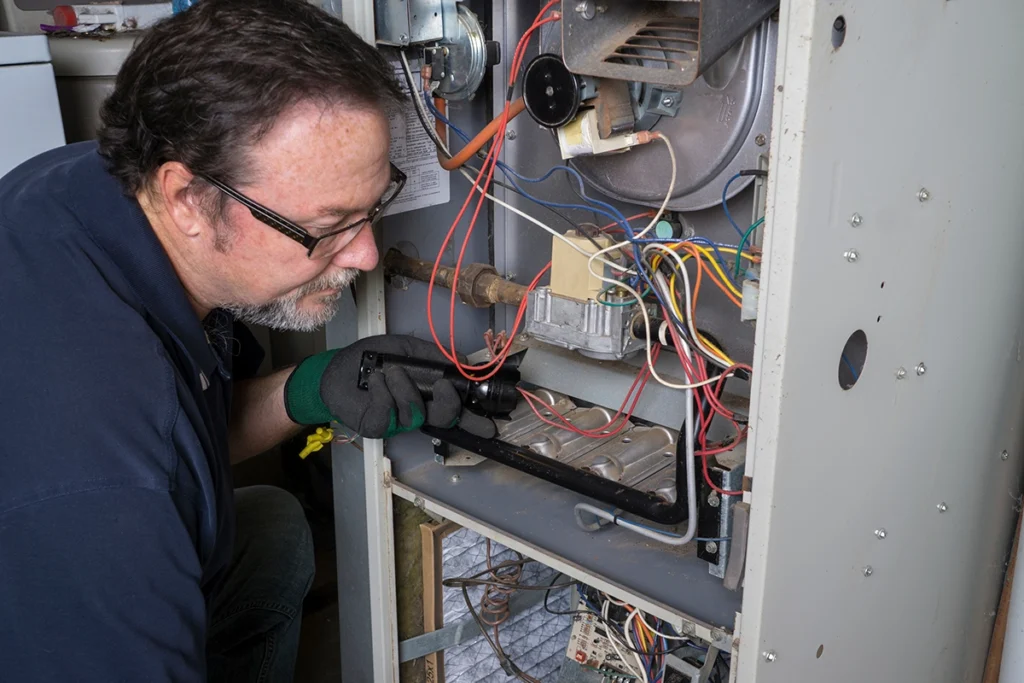
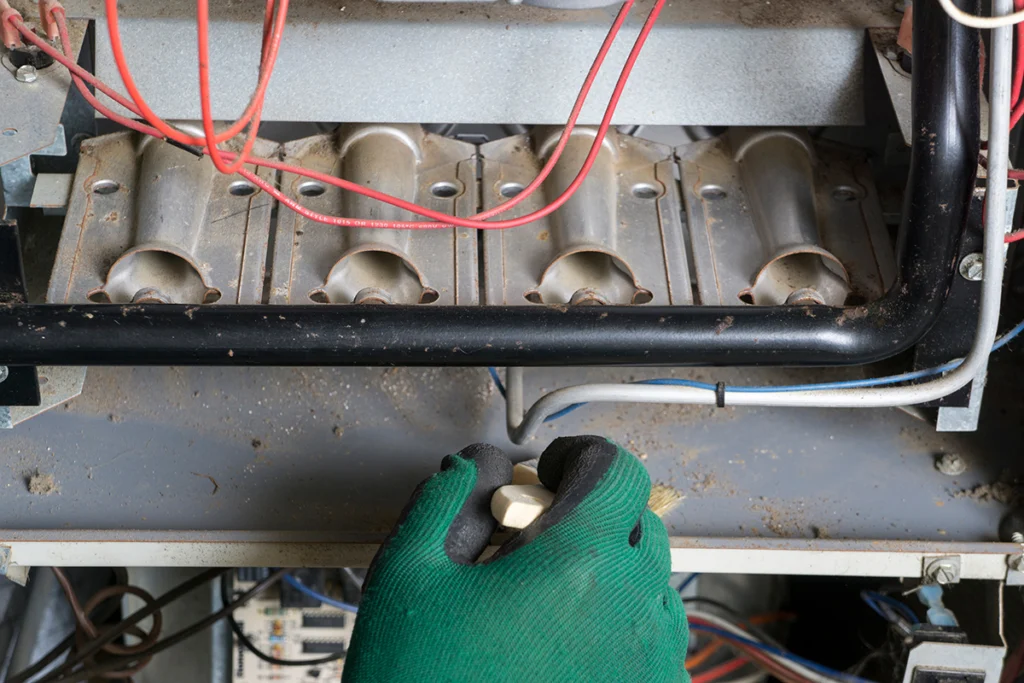
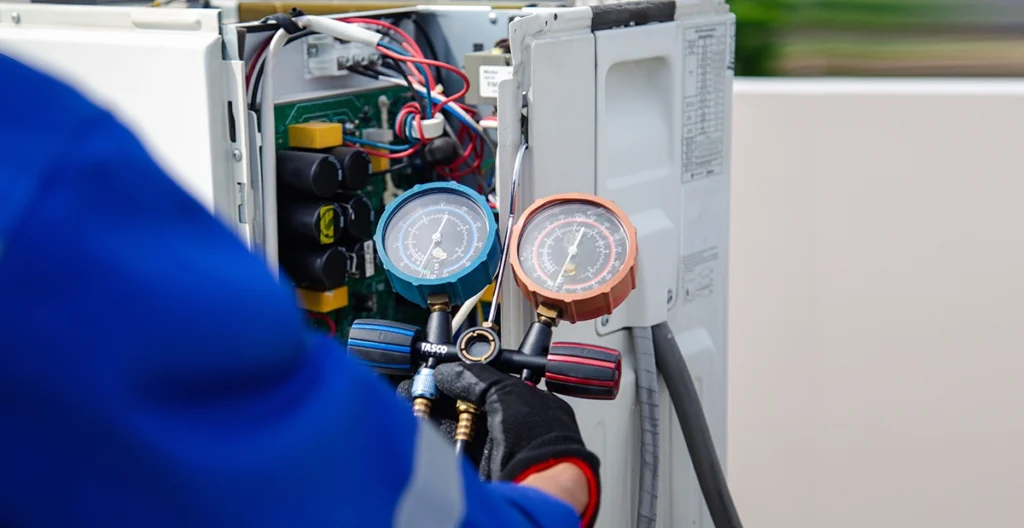
If you’ve had your air conditioning system serviced recently, you may have heard your technician mention r410a refrigerant. This cooling agent has become the industry standard in modern HVAC systems. In fact, it replaced the older R-22 refrigerant that was phased out due to environmental concerns. Understanding what r410a is, how it works, and why it matters can help you make informed decisions about your home comfort system. Whether you’re dealing with a cooling issue or planning to upgrade your equipment, knowing the basics about this refrigerant will give you confidence when talking with HVAC professionals. What Is R410A Refrigerant and Why Does It Matter? R410A is a hydrofluorocarbon (HFC) refrigerant blend used in air conditioning systems and heat pumps. Unlike the older R-22 refrigerant, which contained chlorine and damaged the ozone layer, R410A was developed as an environmentally friendlier alternative. The refrigerant doesn’t contribute to ozone depletion. As a result, it makes a more responsible choice for cooling homes and businesses across the country. This refrigerant operates at higher pressures than R-22. Systems designed for R410A require specific components built to handle these conditions. That’s why refrigerants cannot be interchanged — the entire system needs to be designed from the ground up for the particular refrigerant it uses. Since 2010, all new residential air conditioning systems manufactured in the United States have used R410A as their primary refrigerant. How R410A Refrigerant Works in Your Cooling System Refrigerant is essentially the lifeblood of your air conditioning system. It flows through a closed loop of copper lines, changing from liquid to gas and back again as it absorbs heat from inside your home and releases it outside. The process starts when warm air from your home passes over the indoor evaporator coil. The liquid refrigerant inside that coil absorbs the heat and evaporates into a gas. This heated gas then travels to your outdoor condenser unit. There, the compressor pressurizes it even further. As the hot gas flows through the outdoor coil, it releases the heat it collected from inside your home into the outside air. Once the heat is released, the refrigerant condenses back into a liquid and returns inside to repeat the cycle. This continuous process keeps your home comfortable even during the hottest summer days. Because R410A operates at higher pressures than older refrigerants, it can actually transfer heat more efficiently. This improved efficiency means your system can cool your home using less energy. Consequently, this translates to lower utility bills over time. The increased pressure also allows for smaller equipment that still delivers powerful cooling performance. Signs Your R410A System May Have a Refrigerant Issue Your air conditioning system should maintain the same amount of refrigerant throughout its lifetime. Unlike gasoline in a car, refrigerant doesn’t get “used up” during normal operation. If your system is low on refrigerant, it means there’s a leak somewhere in the system. Recognizing the warning signs early can prevent more serious damage to your equipment. One of the most common signs is reduced cooling performance. If your system runs constantly but never quite reaches the temperature you’ve set on your thermostat, low refrigerant might be the culprit. You may also notice that some rooms feel comfortable while others remain warm. This indicates the system can’t distribute cooled air effectively throughout your home. Ice formation on the indoor evaporator coil or refrigerant lines is another telltale sign. When refrigerant levels drop, the pressure in the system changes, causing the coil to get too cold. Moisture from the air freezes on the coil, which blocks airflow and makes the problem worse. If you see ice on your AC components, turn the system off and call a professional right away. Higher than normal energy bills can also signal a refrigerant issue. When your system doesn’t have enough refrigerant, it has to work much harder and run much longer to achieve the same cooling effect. This extra runtime dramatically increases your energy consumption. You might also hear unusual hissing or bubbling sounds, which could indicate refrigerant escaping through a leak in the system. Why You Should Always Hire a Licensed Professional for Refrigerant Work Working with refrigerants like R410A refrigerant isn’t just complicated — it’s also regulated by federal law. The Environmental Protection Agency requires anyone who handles refrigerants to hold a valid EPA Section 608 certification. This certification ensures that technicians understand proper handling procedures, environmental regulations, and safety protocols. Attempting to add refrigerant yourself or hire an unlicensed person is illegal and can result in significant fines. Beyond the legal issues, refrigerant work involves serious safety risks. R410A operates at much higher pressures than older refrigerants. This means the potential for equipment damage or personal injury is greater. Improper handling can cause refrigerant to spray out forcefully, potentially causing frostbite or eye damage. The system components themselves can become extremely hot or cold during operation, creating additional hazards. There’s also the technical complexity involved. Adding refrigerant to a system with a leak doesn’t solve the underlying problem. In fact, it can make things worse. A certified HVAC technician will locate and repair the leak first, then properly evacuate the system to remove air and moisture before adding the correct amount of refrigerant. They’ll also check the system charge using precise measurements and specialized tools to ensure optimal performance. What Professional R410A Refrigerant Service Involves When you contact a licensed HVAC professional about a suspected refrigerant problem, certified technicians follow a comprehensive diagnostic process. First, they’ll check your system’s operating pressures using manifold gauges to determine if refrigerant levels are actually low. Sometimes, other issues can mimic refrigerant problems. Therefore, proper testing is essential before drawing conclusions. If low refrigerant is confirmed, your technician will conduct a thorough leak detection using electronic leak detectors, ultraviolet dyes, or other specialized equipment. Finding and repairing the leak is always the first priority. Once the leak is fixed, your certified technician will evacuate the system using a vacuum pump to remove any air, moisture, or contaminants

AC refrigerant tank next to an outdoor air conditioner unit during refrigerant service
Air Conditioning, HVAC Systems, Repair

What Is AC Refrigerant and Why Does It Matter?

When your air conditioner stops cooling your home properly, one of the most common culprits is low AC refrigerant. This essential substance circulates through your cooling system, absorbing heat from inside your home and releasing it outside. Without the right amount of refrigerant, your AC simply can’t do its job. Understanding what refrigerant is, how it works, and what happens when something goes wrong can help you identify problems early and know when to call a professional. At C&R Services, we believe in empowering homeowners with knowledge. While refrigerant issues always require professional attention due to EPA regulations and safety concerns, recognizing the warning signs can save you from costly damage and uncomfortable summer days. What Is AC Refrigerant? AC refrigerant is a specialized chemical compound that changes from liquid to gas and back again as it moves through your air conditioning system. It’s the substance that makes cooling possible. As refrigerant circulates, it absorbs heat from your indoor air when it evaporates in the evaporator coil, then releases that heat outside when it condenses in the outdoor condenser unit. Many homeowners mistakenly think refrigerant is a fuel that gets used up like gasoline in a car. That’s not how it works. Your AC system is a closed loop, meaning the refrigerant should never run low under normal circumstances. If your system is low on refrigerant, it means there’s a leak somewhere that needs professional repair. Common Types of AC Refrigerant Over the years, different types of refrigerant have been used in residential air conditioning systems. The type in your system depends on when it was manufactured: R-22 (Freon): Once the most common refrigerant, R-22 has been phased out due to environmental concerns. According to the EPA, U.S. production and import of HCFC-22 ended in 2020, which has made it more expensive and harder to find for older systems. R-410A (Puron): The current standard for most residential AC systems installed in the past 15 years. It’s more environmentally friendly than R-22 and operates at higher pressures. R-454B and R-32: Newer refrigerants being introduced to further reduce environmental impact. R-454B refrigerant and R-32 refrigerant represent the next generation of cooling technology. Knowing which type your system uses is important because different refrigerants aren’t interchangeable. A certified HVAC technician will know exactly which refrigerant your system needs and how to handle it safely. Signs Your AC Refrigerant Is Low Since refrigerant issues are so common, it’s helpful to recognize the warning signs. Here are the symptoms that typically indicate low refrigerant levels: Your AC Is Running But Not Cooling If your air conditioner runs constantly but your home never reaches the temperature set on your thermostat, low refrigerant could be the problem. Without enough refrigerant to absorb heat, the system can’t effectively cool your space. This is different from other causes when your AC is running but not cooling, such as dirty filters or blocked airflow. Ice Buildup on the Refrigerant Lines When refrigerant levels drop, the pressure in your system changes, causing the refrigerant that remains to get too cold. This can lead to ice forming on the copper refrigerant lines or even on the evaporator coil inside your air handler. If you see frost or ice on the lines running to your outdoor unit, don’t ignore it. Hissing or Bubbling Sounds A refrigerant leak often creates a distinctive hissing or bubbling sound as the pressurized gas escapes through a crack or hole. If you hear unusual noises coming from your AC system, especially near the refrigerant lines, it’s time to call a professional. Higher Energy Bills When your system is low on refrigerant, it has to work much harder and run much longer to try to cool your home. This extra runtime shows up on your utility bills. If your energy costs have spiked without explanation, low refrigerant could be one of several possible causes. Longer Cooling Cycles A properly functioning AC should run in regular cycles, turning on and off as needed to maintain your desired temperature. With low refrigerant, your system may run almost continuously without ever reaching the target temperature, putting excessive wear on components. What Causes AC Refrigerant Leaks? Understanding what causes refrigerant leaks can help you take preventive measures and catch problems early. Here are the most common causes: Corrosion: Over time, moisture and chemicals can corrode the copper refrigerant lines or coil connections, creating small holes where refrigerant escapes. Vibration damage: Normal AC operation involves vibration, especially in the outdoor unit. Years of vibration can loosen connections or create wear points that eventually leak. Poor installation: Improperly brazed connections or overtightened fittings during initial installation can develop leaks months or years later. Physical damage: Lawn equipment, extreme weather, or accidental impacts can puncture refrigerant lines or damage the outdoor coil. Factory defects: Though less common, manufacturing flaws can cause premature failures in coils or connections. A certified HVAC technician will use specialized leak detection equipment to locate even the smallest leaks. Simply adding more refrigerant without fixing the leak is a temporary fix that wastes money and harms the environment. Why You Shouldn’t Handle AC Refrigerant Yourself Unlike many home maintenance tasks, working with AC refrigerant isn’t a DIY project. Here’s why professional service is essential: It’s Federally Regulated The EPA’s Section 608 Technician Certification Requirements explain that refrigerant handling is federally regulated, and technicians must earn EPA-approved certification to work with these systems properly. These rules exist because improper handling and venting can harm the environment. Specialized Equipment Is Required Properly diagnosing refrigerant issues requires gauges, leak detectors, recovery equipment, and vacuum pumps. Adding refrigerant isn’t as simple as pouring it in—the system must be evacuated of air and moisture, then charged to precise specifications based on weight or subcooling/superheat measurements. Safety Concerns Refrigerant is stored under extremely high pressure. Improper handling can cause frostbite, chemical burns, or eye injuries. Some refrigerants can also displace oxygen in confined spaces, creating suffocation hazards. You Could Damage Your System Overcharging or undercharging refrigerant can

Technician holding an hvac capacitor inside an outdoor AC unit during repair service
Air Conditioning, HVAC Systems, Repair

HVAC Capacitor Problems: Signs Your AC Unit Needs Help

When your air conditioning system suddenly stops working or begins struggling to start, the culprit might be a small but critical component called the HVAC capacitor. This essential part plays a vital role in keeping your cooling system running smoothly, and understanding its function can help you recognize when professional intervention is needed. What Is an HVAC Capacitor and Why Does It Matter? An HVAC capacitor is an electrical component that stores and releases energy to help your air conditioning system’s motors start and run efficiently. Think of it as a battery that provides the initial electrical boost needed to get your AC’s compressor and fan motors spinning. Without a properly functioning capacitor, your system may struggle to start or fail to operate altogether. There are two main types of capacitors in most HVAC systems: start capacitors and run capacitors. Start capacitors provide the initial jolt of power needed to get motors running, while run capacitors help maintain steady operation once the system is up and running. Some systems use a dual capacitor that combines both functions into one unit. Common Signs Your HVAC Capacitor Is Failing Recognizing the warning signs of a failing capacitor can help you address the issue before it leads to more expensive repairs or complete system failure. Here are the key symptoms to watch for: Your AC Unit Won’t Start If your air conditioning system doesn’t turn on when you adjust the thermostat, a faulty capacitor could be preventing the motors from starting. You might hear the system trying to start with clicking sounds or humming, but the outdoor unit never actually begins running. A capacitor is one possible reason an AC will not turn on, but it is not the only issue that can keep a system from starting. Hard Starting or Delayed Operation A struggling capacitor often causes hard starting, where your AC takes multiple attempts to begin operating or experiences significant delays between the thermostat call and actual startup. This puts additional strain on your system’s components and increases energy consumption. Intermittent Operation Capacitor problems can cause your system to start and stop unexpectedly or run for short periods before shutting down. This erratic behavior indicates the capacitor isn’t providing consistent power to keep the motors running smoothly. Unusual Sounds Listen for humming, buzzing, or clicking sounds coming from your outdoor unit. These noises often indicate that the system is trying to start but lacks sufficient electrical support from the capacitor. Reduced Cooling Performance When a run capacitor begins failing, your system might still operate but with reduced efficiency. You may notice that your home takes longer to cool down or doesn’t reach the desired temperature consistently. What Causes HVAC Capacitor Failure? Understanding the common causes of capacitor failure can help you appreciate why regular maintenance is so important for your HVAC system’s longevity. Age and Normal Wear Like all electrical components, capacitors have a limited lifespan. Most HVAC capacitors last between 10-20 years, but factors like usage patterns and environmental conditions can affect their longevity. As capacitors age, their ability to hold and release electrical charge gradually diminishes. Heat and Electrical Stress Capacitors are particularly sensitive to heat and electrical stress. Extended operation in high temperatures, power surges, and frequent cycling can accelerate wear and cause premature failure. The Department of Energy notes that regular air conditioner maintenance helps support efficient performance and can reduce issues that lead to premature system problems. Power Issues Voltage fluctuations, power surges, and electrical storms can damage capacitors instantly or weaken them over time. Installing surge protection can help protect these sensitive components from electrical damage. Manufacturing Defects Occasionally, capacitors may fail prematurely due to manufacturing defects or poor quality components. This is why choosing reputable HVAC contractors who use quality parts is essential for long-term system reliability. The Professional Capacitor Replacement Process When you call C&R Services for capacitor issues, our certified technicians follow a comprehensive diagnostic and replacement process to ensure your system operates safely and efficiently. First, our technician will perform electrical tests to confirm the capacitor is indeed the problem and not a symptom of a larger issue. They’ll check voltage readings, inspect connections, and examine the capacitor for physical signs of failure like bulging, leaking, or corrosion. If replacement is needed, the technician will safely discharge any remaining electrical charge, disconnect the old capacitor, and install a properly rated replacement. They’ll also inspect related components like contactors and wiring to ensure the entire system is in good working order. Why Professional Service Matters for HVAC Capacitor Issues While a failing capacitor might seem like a simple electrical component, HVAC systems involve high voltage electricity and specialized knowledge that make professional service essential for safety and effectiveness. Licensed technicians have the proper tools and training to safely work with electrical components while your system is energized. They can also identify underlying issues that might have contributed to capacitor failure, preventing future problems and ensuring your investment is protected. Additionally, professional service ensures the correct capacitor specifications are used. Using the wrong voltage rating or capacitance value can damage other system components or create safety hazards. Preventing Capacitor Problems Through Regular Maintenance The best way to avoid unexpected capacitor failures is through regular preventive maintenance. During routine service visits, HVAC professionals can test capacitor function, clean electrical connections, and identify potential issues before they cause system failures. Regular maintenance also helps address factors that contribute to premature capacitor failure, such as dirty coils that cause overheating, loose electrical connections that create voltage fluctuations, and worn components that put additional stress on the electrical system. When to Call C&R Services for HVAC Capacitor Service If you’re experiencing any of the warning signs mentioned above, don’t wait for complete system failure. Early intervention can often prevent more extensive damage and costly repairs. Our team of certified technicians has the expertise to quickly diagnose capacitor issues and restore your system’s reliable operation. At C&R Services, we understand that HVAC problems never happen at convenient

HVAC technician diagnosing an AC not turning on problem at an outdoor condenser unit
Air Conditioning, HVAC Systems, Repair

AC Not Turning On? Common Causes & Fixes

When an AC is not turning on, most people want to know one thing fast: is this something simple or a repair call? At C&R Services, we troubleshoot this issue all the time. Some causes are quick to rule out, while others need professional diagnosis right away. Before you assume the worst, start with a few safe checks. In many cases, the issue is a thermostat setting, a tripped breaker, or a clogged drain safety switch. Still, if you notice a burning smell, buzzing, or repeated breaker trips, stop there and call for service. Start With the Thermostat Before Anything Else First, check the thermostat mode. Make sure it’s set to Cool and the temperature is lower than the room temperature. It sounds basic, but this gets missed often (especially after someone changes settings overnight). Also, check batteries if your thermostat uses them. A blank screen or delayed response can point to low power. If your controls seem off, it helps to review common thermostat issues before assuming the outdoor unit failed. A lot of calls we get about AC units not turning on end up being a thermostat setting or power issue. Check for a Schedule or “Hold” Setting Sometimes the thermostat is working fine, but the schedule is overriding your settings. In that case, the AC may not start when you expect. So, confirm there is no schedule conflict, temporary hold, or smart-home automation rule interfering. AC Not Turning On After a Breaker Trip Next, check your electrical panel. If the AC breaker has tripped, reset it once. If it trips again, do not keep resetting it. That usually signals an electrical or equipment problem. Repeated breaker trips can point to a wiring issue, a failing component, or a problem in the outdoor unit, and they should be checked by a technician. When a Breaker Trip Means “Stop and Call” If the breaker trips immediately after reset, or you smell something hot, shut the system off and call a pro. Those are signs the issue may be electrical, and it should be diagnosed safely. Check the Air Filter and Airflow A dirty filter alone usually will not keep an AC from turning on. However, restricted airflow can contribute to freeze-ups, drain issues, and shutdowns on some systems. The U.S. Department of Energy says dirty, clogged filters reduce airflow and system efficiency. It recommends checking your filter every month during cooling season and replacing it as needed, often every one to two months depending on use and filter type. If your filter looks packed with dust, replace it, restore power/settings if needed, and give the system a few minutes to respond. AC Not Turning On Because of a Condensate Drain Issue Many systems have a float switch that shuts cooling off when the condensate drain backs up. That is a protective feature, and it can save you from water damage. ENERGY STAR’s maintenance checklist includes condensate drain inspection because a plugged drain can cause water damage and affect indoor humidity levels. It also recommends checking system controls to confirm the equipment starts, runs, and shuts off properly. If you see water near the indoor unit, this cause jumps higher on the list. Listen for What the System Is (or Isn’t) Doing Now pay attention to the symptoms: No sound at all Indoor fan runs, but outdoor unit does not Clicking sounds, but no startup Humming without full startup When we’re on a service call for an AC unit not turning on, these details help us narrow whether the issue is power, a capacitor, contactor, motor, or a control problem. If the system turns on but still does not cool well, shift your focus to airflow, refrigerant, or outdoor unit problems rather than startup controls. What You Can Safely Do Yourself Here are a few safe checks you can try before calling: Check thermostat settings and batteries Confirm the breaker is on Replace a dirty filter Check that the disconnect is in place (if visible and safe to inspect) Look for visible water around the indoor unit That said, avoid opening electrical panels inside the unit or testing capacitors yourself. Those repairs can be dangerous. When to Call for AC Repair If Your AC Is Not Turning On If your AC is not turning on after the basic checks, it’s time for service. In our experience, waiting can make the underlying problem worse, especially during peak heat. If you need a professional diagnosis, a good next step is scheduling air conditioning repair service so the system can be tested safely and the root cause confirmed. At C&R Services, we handle no-start cooling calls, electrical diagnostics, and system repairs for homes and businesses across Tyler and East TX. Contact us if you want us to take a look and get your system back on track. Quick FAQs When You Have an AC Not Turning On These are the questions we hear most often, and they are great for quick troubleshooting before you call.

technician working to fix a heat pump by diagnosing the outdoor unit components
Heat Pumps, Maintenance, Repair

How to Fix a Heat Pump: Common Problems & Solutions

When people need to fix a heat pump, they often assume the entire system has failed. In our day-to-day work at C&R Services, that is usually not the case. More often, we find a control issue, airflow restriction, sensor problem, or deferred maintenance issue affecting performance in a home or commercial space. That’s also why heat pump problems can feel confusing. These systems heat and cool, switch modes, and often run longer than a furnace or AC unit. So, whether you manage a house, office, storefront, or light commercial property, this guide will help you understand what’s normal, what’s not, and what to check before scheduling service. What to Check First Before You Try to Fix a Heat Pump Start with the basics first. It sounds simple, but it saves a lot of time. Before assuming you need a major repair, check these items: Thermostat is set to the correct mode (HEAT or COOL) Temperature setting is calling for operation Breakers are on and not tripped Air filter is clean Outdoor unit is clear of leaves and debris Indoor vents and returns are open and not blocked We see plenty of no-heat and weak-heating situations that trace back to setup issues. For example, if the unit is not responding at all, it helps to know the common signs of a thermostat not working before assuming the heat pump itself is bad. Airflow is another big one. A dirty filter or blocked return can cause symptoms that look like a component failure. In both residential and commercial spaces, restricted airflow can reduce output, increase run time, and create comfort complaints fast. Common Reasons You May Need to Fix a Heat Pump Heat pump issues usually follow patterns. Once you understand them, troubleshooting becomes much easier. Thermostat or Control Problems Sometimes the heat pump is fine, but the control signal is not. Incorrect programming, weak batteries, wiring issues, or a failed thermostat can all stop proper operation. We also see misconfigured replacement thermostats cause heating and cooling issues. Airflow Restrictions Low airflow can cause poor heating, poor cooling, short cycling, and even coil icing. Dirty filters, closed vents, blocked returns, and blower problems are all common causes. Defrost Cycle Confusion In winter, a heat pump may temporarily switch into defrost mode. During that cycle, the indoor air can feel cooler for a few minutes. That can seem like a failure, but it’s often normal system operation. The U.S. Department of Energy explains that heat pumps periodically enter a defrost cycle in cold weather. Refrigerant or Coil Issues Low refrigerant, refrigerant leaks, or coil performance problems can reduce capacity. If the system struggles in both heating and cooling modes, refrigerant charge and coil condition become more likely suspects. Electrical Component Failures Capacitors, contactors, relays, boards, and motors can fail over time. These issues often show up as humming, clicking, delayed starts, or systems that try to start and shut back off. How to Fix a Heat Pump That Is Not Heating Properly When a heat pump runs but doesn’t heat, the issue usually falls into one of three categories: thermostat setup, airflow restriction, or staging confusion. First, confirm the thermostat is actually calling for heat. Then determine whether the system may be in a normal defrost cycle. During defrost, the system temporarily switches modes to clear frost from the outdoor coil. While this happens, the indoor air may feel cool for several minutes. That is normal. However, if the air stays cool for long periods, the system is not producing adequate heat. Watch for These Signs Outdoor unit heavily iced over System runs continuously but temperature does not rise Auxiliary heat activates frequently Air feels lukewarm instead of warm One situation that commonly gets mistaken for a failure is backup heat staging. The heat pump may run continuously while the indoor temperature barely rises or the air feels only mildly warm. In many cases the equipment is operating, but the thermostat is not bringing on its backup heating stage correctly. When that happens, the issue is usually control setup rather than a mechanical failure.  When “Fix a Heat Pump” Really Means “Fix Airflow” Airflow problems are easy to miss. However, they cause a huge number of performance complaints. A heat pump depends on steady airflow across the indoor coil. If airflow drops, system capacity drops too. In some cases, the indoor coil can freeze. In other cases, the system runs longer and still cannot hold temperature. We see this in homes all the time, but we also see it in offices, retail spaces, and light commercial buildings. A clogged filter, blocked return, or neglected maintenance can make a heat pump look like it failed when the real problem is restricted airflow. That’s why we always check the air filter, return airflow, and blower operation before assuming something is broken. Poor airflow is one of the most common reasons people try to fix a heat pump that won’t heat properly. In many homes, restoring airflow either solves the problem completely or reveals what the system was actually struggling with. How to Fix a Heat Pump Thermostat and Control Setup Issues Thermostat setup causes more service calls than people expect. Sometimes the equipment is working, but the programming is not. Common setup mistakes include: Wrong equipment type selected after thermostat replacement Heat pump configured as a conventional furnace/AC system Aggressive setbacks that trigger backup heat too often Fan set to ON, which can feel drafty between heating cycles Mode changes scheduled incorrectly Heat pump thermostats also control the backup heating stage. If staging is set up incorrectly, the system can run for long periods while the indoor temperature barely rises. Many people think they need to fix a heat pump when the equipment is actually working, but the thermostat isn’t bringing on the backup heat when it should. Learning when a heat pump brings on auxiliary heat can help you tell whether the problem is setup or equipment. Emergency heat is a different setting.

HVAC technician diagnosing an AC unit that is running but not cooling
Air Conditioning, HVAC Systems, Repair

AC Running But Not Cooling? Causes & Easy Fixes

An AC running but not cooling can be frustrating, and it’s a problem we see often at C&R Services in both homes and businesses. The system appears to be working — the fan is running, the outdoor unit is operating — yet the indoor temperature doesn’t drop. In many cases, the cause is simpler than you might expect, and understanding the common reasons can help you know what’s going on before calling for repairs. How Your Air Conditioner Is Supposed to Cool Air conditioners don’t create cold air. Instead, they remove heat from the indoor air and transfer it outside, leaving your home or office cooler and more comfortable. The U.S. Department of Energy explains that air conditioners cool buildings by transferring heat from indoor air to the outside environment rather than producing cold air. This heat-transfer process depends on proper airflow, refrigerant levels, and functioning components to work efficiently. Warm indoor air is pulled through the return duct and passes over the evaporator coil. Inside that coil, refrigerant absorbs heat from the air. The blower then pushes the cooled air back through the ductwork and into the building. After absorbing heat indoors, the refrigerant travels to the outdoor condenser unit. The compressor raises the refrigerant’s pressure, which also increases its temperature. Because the refrigerant is now hotter than the outdoor air, the condenser coil can release heat outside. As long as this cycle continues without interruption — whether due to airflow, controls, or refrigerant issues — indoor temperatures drop. If any part of the process fails, the system may keep running while the building becomes warmer instead of cooler. Because multiple components must work together during this heat-transfer cycle, a failure in airflow, electrical control, or refrigerant pressure often requires professional air conditioning repair to restore proper cooling. AC Running But Not Cooling: Start With the Thermostat This is the first thing we check on service calls. Make sure: cooling mode is selected fan is set to AUTO temperature is set lower than room temperature In commercial buildings, programmable or network thermostats may also have schedules overriding your settings. If the display is blank, inaccurate, or unresponsive, the issue may not be the AC equipment at all. The thermostat may not be sending a cooling signal to the system. When that happens, the indoor fan can continue running while the outdoor unit never starts, which makes it feel like the AC is operating but not cooling. We’ve restored cooling many times just by correcting thermostat settings, replacing batteries, or repairing a faulty thermostat. If your thermostat is unresponsive or behaving inconsistently, you may be dealing with a thermostat not working properly. AC Running But Not Cooling: Airflow Problems (The Most Common Cause) In many service calls, the system is running, but it is not removing heat from the building. Air conditioning depends on steady airflow across the evaporator coil. As warm air passes over that coil, the refrigerant absorbs heat and carries it outdoors. When airflow becomes restricted, the evaporator coil cannot absorb enough heat. The blower continues circulating air, but the air passing through the system is not being cooled effectively. As a result, the unit may run continuously while indoor temperatures slowly rise. Airflow problems are one of the most common reasons an AC is running but not cooling, especially in buildings with higher occupancy or rooms that remain closed for long periods. Dirty Filter A clogged air filter is the most frequent airflow restriction we find when an AC is running but not cooling. Filters are designed to trap dust and airborne particles before they reach the evaporator coil. Over time, that buildup prevents enough warm air from moving across the coil. Without sufficient airflow, the refrigerant becomes too cold and moisture in the air begins freezing on the coil surface. As ice forms, air can no longer pass through the coil, so cooling stops circulating through the duct system even though the equipment is still running. In many cases, the restriction that caused the freezing started with a heavily clogged filter. Routine filter replacement is important in both homes and commercial spaces. The Environmental Protection Agency notes that proper air filtration helps maintain ventilation and indoor air quality, which is why a heavily clogged filter can quickly affect system performance. You can usually check this yourself. Remove the air filter and hold it up to a light. If little or no light passes through, airflow is heavily restricted and the system may stop cooling. Blocked Return Vents Air must move through the system in a loop. Supply vents push cooled air into the room, while the return air vent pulls warmer air back to the unit to be cooled again. We frequently find conference rooms, storage areas, and bedrooms where furniture, shelving, or stored items block the return air vent. When the return is blocked, the system may keep running but the temperature barely changes because the same air is being circulated instead of new warm air being cooled. Signs Return Airflow Is Blocked You may notice: strong airflow from some vents but weak airflow from others certain rooms never reaching the thermostat setting doors that push closed when the system starts the system running constantly with little temperature change Restoring return airflow often brings cooling back without any mechanical repair. AC Running But Not Cooling: Frozen Evaporator Coil One of the most common reasons a system runs but won’t cool is a frozen indoor evaporator coil. When the coil is covered in ice, the air conditioner may appear to be operating, but heat can no longer be removed from the building. Why Freezing Happens Freezing usually develops after an airflow or refrigerant issue. If the coil cannot absorb enough heat, its temperature drops below freezing and moisture in the air turns to ice. As the ice builds, airflow through the system becomes more restricted and cooling stops completely. Common causes include clogged filters, blocked return vents, blower issues, or low refrigerant. Signs the

Homeowners checking a thermostat when a heater isn’t working properly in winter
Heating, Repair

Heater Not Working? Why Your Heat Isn’t Turning On

Winter service calls usually start the same way — with a heater not working and a house that’s getting colder by the hour. Sometimes the system won’t turn on. Other times, it runs nonstop but never produces heat. Either way, the stress adds up quickly. From our day-to-day work at C&R Services, we’ve learned that most heating problems follow predictable patterns once you know what to look for. Fortunately, a heater not working doesn’t always mean a major breakdown. In many cases, the issue starts with airflow, controls, or built-in safety devices. Knowing how these systems behave can help you tell what’s normal, what’s not, and when professional heating repair makes sense. When a Heater Isn’t Working at All When a heater won’t turn on at all, we begin by confirming the system can actually start a heating cycle. Power interruptions, tripped breakers, or fuel supply issues can stop heating before it ever gets going. These problems are easy to miss, yet they account for a surprising number of winter service calls. If power and fuel are present, we shift our focus to the system’s controls and safety logic. Modern heating equipment won’t start if it senses a condition that could cause damage or unsafe operation. In many cases, the heater is being prevented from turning on—not because it’s broken, but because a control or safety component is doing its job. When that protection keeps activating, further diagnosis is needed. Heater Not Working but the System Is Running In some situations, the heating system turns on and stays running, but the house never gets warmer. You may hear the blower operating, feel air moving through the vents, and assume heat should follow. Instead, the temperature stays flat. This usually means the system is starting a cycle but can’t complete it. Problems with airflow, ignition, or internal heat transfer can stop heat from being produced or delivered, even though the system appears active. When that happens, the heater may run longer than normal while never actually warming the living space. Heater Blowing Cold Air Instead of Heat One symptom we see frequently is a heater blowing cold air. While that can feel alarming, it isn’t always dangerous. For example, furnaces sometimes blow cool air briefly before warming up. However, ongoing cold airflow usually signals a problem that needs attention. In many service calls, we find dirty filters, overheating protection, or ignition failures behind the issue. If the air never warms up, learning what causes a heater to blow cold air can help you decide whether it’s normal behavior or time to call for service. Heater Not Working Because of Thermostat Issues Before assuming equipment failure, thermostat operation deserves attention. A heater not working complaint often traces back to incorrect settings, dead batteries, or wiring problems at the thermostat. Because thermostats control when heating cycles begin and end, even minor issues can stop heat completely. We often help homeowners understand what happens when a thermostat isn’t working correctly, since fixing control problems early can restore heat without deeper repairs. Safety Devices That Can Stop Heat Suddenly Modern heating systems include safety components designed to shut things down when conditions become unsafe. While these protections are critical, they can also cause confusion when a heater not working situation appears without warning. One common example is overheating protection. When internal temperatures rise too high, the system shuts off automatically. This often relates to airflow restrictions or mechanical wear. Learning how a furnace limit switch shuts down heating to prevent damage helps explain why heat may stop even when nothing appears broken. When Safety Shutdowns Point to Bigger Issues In more serious cases, repeated shutdowns point to underlying problems that affect safe operation. Components like the heat exchanger play a critical role in transferring heat while keeping combustion gases contained. When damage occurs, the system may shut down repeatedly or stop heating altogether. According to the Centers for Disease Control and Prevention, each year more than 400 Americans die from unintentional carbon monoxide poisoning not linked to fires, with more than 100,000 emergency department visits and over 14,000 hospitalizations tied to CO exposure. Because of that risk, any heater not working issue paired with unusual odors, alarms, or repeated shutdowns should be addressed immediately. Why Professional Heating Repair Matters Although some heating issues are simple, others require professional tools and diagnostics. At C&R Services, we focus on identifying the root cause instead of applying temporary fixes. A trained technician can safely evaluate controls, combustion, airflow, and safety systems together. If your heater isn’t working consistently, professional service helps prevent repeated shutdowns and protects long-term system health. What Homeowners Can Check Before Calling While not every heating issue is DIY-friendly, a few quick checks can often help clarify why heat isn’t coming through the system. Start by confirming the thermostat has power and is set correctly. Then, check the air filter for dirt or blockage. Closed or obstructed vents can also restrict airflow and prevent warm air from circulating through the house. Finally, listen for unusual startup noises, which can signal an internal issue. Airflow problems are one of the most common reasons a heater struggles to warm a home. According to ENERGY STAR, airflow issues can reduce a heating system’s energy efficiency by up to 15 percent, which often leads to uneven temperatures or repeated shutdowns during winter operation. If heat still doesn’t return after these checks, delaying service often leads to larger repairs and longer downtime. When to Call C&R Services When your heater isn’t working and your home is getting colder, fast answers matter. Our team helps homeowners understand what’s happening and what steps restore heat safely. We work with furnaces, heat pumps, and electric systems, so issues don’t get overlooked. If you’re in Tyler or East Texas and your heat isn’t working, contact C&R Services to schedule service. Our technicians provide professional heating repair to restore comfort quickly and safely. Frequently Asked Questions When the Heat Stops Working Heating problems raise

Thermostat not working and showing an incorrect indoor temperature on the display
HVAC Systems, Repair, Thermostats

Thermostat Not Working: Common Causes and Fixes

When homeowners call us frustrated, the issue can start with a thermostat not working the way it should. From our day-to-day work at C&R Services, we see how quickly a small control issue can disrupt comfort. Fortunately, many thermostat problems follow predictable patterns. Once you understand those patterns, the fixes become much clearer and far less stressful. Although the thermostat looks simple, it controls everything your heating and cooling system does. Because of that, a minor issue can feel like a major system failure. Before assuming the worst, it helps to walk through the most common causes step by step. In many cases, the fix is straightforward once the underlying cause is identified. Why a Thermostat Not Working Feels Like a System Breakdown When a thermostat not working properly sends incorrect signals, the system responds in confusing ways. Sometimes nothing happens at all. Other times, the system runs but delivers the wrong temperature. In our experience, this confusion leads many homeowners to suspect expensive equipment failures. However, the thermostat itself is often the real issue. That’s why starting with the control side saves time and unnecessary repairs. Thermostat Not Working Due to Power Issues One of the first things we check is power. A thermostat needs a steady power source to function correctly. Battery-powered models can stop working as batteries weaken, while hardwired thermostats may lose power due to tripped breakers or wiring issues. Because of that, a quick power check often reveals the problem right away. Thermostat Not Working Because of Mechanical Wear In older systems, the thermostat itself can also be part of the issue. Older mechanical thermostats rely on physical components that expand and contract with temperature changes, which can affect accuracy over time. For a clear explanation of how these thermostat designs work, ExplainThatStuff offers a helpful breakdown. Thermostat Not Working Because of Incorrect Settings Sometimes the issue isn’t hardware at all. Instead, it’s a simple setting problem. Mode selection matters. Heat, cool, auto, emergency heat, and auxiliary heat all behave differently. If settings don’t match the season, comfort suffers. For heat pump systems, confusion around backup heating is common. That’s why understanding what auxiliary heat is helps explain why systems sometimes behave unexpectedly during cold weather. Emergency heat, which is manually activated, can create similar confusion if selected accidentally. When a Thermostat Not Working Causes No Response at All If the system doesn’t start, the thermostat may not be sending a call for heating or cooling. In these cases, homeowners often assume the furnace isn’t turning on. While equipment issues do happen, thermostat signal failures are frequently responsible. Loose wires, damaged terminals, or failed internal sensors can all prevent startup. Addressing the control issue first avoids unnecessary component replacement. Thermostat Not Working and Warm Air Problems Another common complaint involves systems running but delivering the wrong temperature. In heating season, that usually means warm air never arrives. This scenario often overlaps with questions about why a heater seems to be blowing cold air. While mechanical causes exist, thermostat calibration errors or incorrect mode selection are frequently involved. When temperature readings drift, the thermostat may think the home is already warm. As a result, it short-cycles or fails to activate proper heating stages. Environmental Factors That Affect Thermostat Accuracy Placement matters more than most people realize. A thermostat near windows, exterior doors, or heat-producing appliances can misread room temperature. Sunlight exposure also skews readings. Because of that, systems may cycle incorrectly even when nothing is technically broken. During winter, heating systems run longer, which can make control issues more noticeable. As systems cycle more frequently, small thermostat inaccuracies tend to stand out faster, especially when a thermostat not working properly struggles to keep up with demand. The U.S. Department of Energy also shares general winter energy tips that explain why heating demand increases during colder months. Smart and Programmable Thermostat Issues Smart thermostats add efficiency but introduce new variables. Software updates, Wi-Fi interruptions, and compatibility issues can all interfere with operation. In the field, we see advanced features cause confusion when settings don’t align with how the system actually runs. Scheduling conflicts or incorrect learning behavior can mimic system failure. Although these thermostats offer real benefits, they still rely on correct setup. With proper configuration, they perform well, but when settings drift, comfort issues can show up quickly. When to Replace a Thermostat Instead of Repairing It Not every thermostat issue justifies repair. Older units lack modern accuracy and efficiency. Over time, internal sensors wear out and drift beyond reliable limits. If repairs repeat, replacement becomes the smarter choice. Modern thermostats improve comfort while reducing energy waste. In many cases, homeowners notice immediate improvements after upgrading. At C&R Services, we help homeowners choose thermostats that match their system type, usage habits, and comfort goals. Final Thoughts A thermostat not working rarely means disaster. More often, it signals a manageable control issue. With proper diagnosis, most problems resolve quickly and affordably. If uncertainty remains, professional evaluation prevents guesswork. At C&R Services, we take a diagnostic-first approach to protect both comfort and equipment life. If a thermostat not working continues to cause problems, a professional system evaluation can help identify whether the issue is control-related or system-related. If your thermostat continues acting up, contact us for expert help. We proudly serve homeowners across Tyler and East Texas, and we’re always ready to help restore comfort. Frequently Asked Questions About Thermostat Issues Below are a few quick answers we hear often from homeowners.

HVAC technician inspecting the internal gas valve and ignition components inside a furnace
Heating, Maintenance, Repair

Gas Valve on a Furnace: What It Does and Why It Matters

Most homeowners don’t think about the gas valve on a furnace until something suddenly changes—maybe the heat won’t kick on, the pilot won’t stay lit, or the system just feels off. At C&R Services, we know how much this one component can influence your furnace’s performance and safety. It looks simple, yet it plays a crucial role whenever your system needs to heat your home. What the Gas Valve on a Furnace Actually Does The gas valve on a furnace regulates how much fuel flows to the burners. It opens and closes in sync with the ignition, thermostat signals, and safety sensors. When everything works together, the flame stays steady and efficient. When something slips out of balance, the furnace can lose heat, short-cycle, or fail to start. Even the U.S. Department of Energy notes that proper fuel delivery is essential for safe and efficient combustion. Their heating guidance reinforces how key components like gas valves directly affect system performance. Because the valve manages the most sensitive part of the combustion process, small issues can grow quickly if ignored. Warning Signs Your Furnace Is Struggling Homeowners usually notice a few warning signs before the valve completely fails. The most common include: Heat not reaching the set temperature Furnace shutting down before completing a cycle Pilot flame refusing to stay lit Delayed or unusually loud ignition Burners not firing consistently When the pilot won’t stay on, many people think the flame sensor is the problem. However, the gas valve on a furnace is often part of the story too. If you’d like help sorting out that symptom, our post about what to check when a furnace pilot light won’t stay lit offers an easy breakdown. Another early sign is when the furnace doesn’t start at all. Because this issue appears in many homes, we built a guide that helps you know what to check first when a furnace won’t turn on. Why the Gas Valve on a Furnace Matters for Home Safety Although many furnace parts support comfort, the gas valve on a furnace is a true safety device. It prevents gas from leaking into the system when ignition fails. It also shuts down fuel the moment sensors detect something unsafe. Because these valves protect homes from combustion hazards, they’re built with multiple fail-safe mechanisms. Still, wear and tear affects performance over time. As winters shift colder in many regions, seasonal stress on heating systems rises too. NOAA explains that winter storms impact every U.S. region, including southern states that rarely see freezing weather. These sharp weather swings often push heating systems to work harder, especially older furnaces. When more demand hits a furnace, weak components reveal themselves fast. That’s why routine inspections matter so much. How Technicians Diagnose Issues With the Gas Valve on a Furnace When we troubleshoot heating calls at C&R Services, we evaluate ignition order, flame quality, electrical signals, and sensor function before reaching the gas valve. But once we get there, we test voltage, resistance, and valve response. This approach prevents unnecessary replacements and helps homeowners avoid bigger repairs. When the Gas Valve on a Furnace Needs Replacement Sometimes the valve fails completely. Other times, carbon buildup, moisture exposure, or a weak solenoid causes intermittent problems. If the valve sticks or delivers inconsistent fuel pressure, replacement becomes the safest choice. Even though these issues sound technical, homeowners usually notice them early—often as fluctuating heat or repeated startup failures. That’s why it helps to understand how the entire furnace system operates. If you ever want the full picture of how all components fit together, our main guide explaining what a furnace is and how it works breaks down the whole heating sequence in a simple, step-by-step way. Preventing Gas Valve Issues With Routine Furnace Care Proper maintenance reduces the chances of gas valve failure. Keeping the burners clean, replacing filters, confirming airflow, and ensuring sensors work correctly all protect the valve from unnecessary strain. At C&R Services, we encourage homeowners to schedule seasonal tune-ups before heavy heating demands arrive. This timing helps us catch problems early, especially in older systems or furnaces that have shown recent inconsistencies. Because many issues start small, quick adjustments often prevent bigger problems later. When to Call a Professional A failing gas valve on a furnace can create confusing symptoms. Sometimes the furnace won’t ignite. Other times the flame cuts out without warning. Because the valve controls fuel delivery, any issue tied to it deserves a closer look from a technician. Even small problems grow quickly when the furnace runs more often during cold weather. If your system keeps shutting down, loses its flame, or shows repeated ignition trouble, it’s best to schedule an inspection. That way, a professional can confirm whether the issue is the gas valve or another part in the ignition sequence. And since gas components must be handled carefully, homeowners should avoid adjusting or testing them without training. At C&R Services, we offer a wide range of furnace services. We’ll diagnose the issue, test the failing parts, and make safe repairs when needed. Need Help With a Furnace? If the gas valve on your furnace seems to be failing or your system has been acting up, reach out to C&R Services. We help homeowners across Tyler and East Texas stay safe and comfortable all winter. Contact us today to schedule fast furnace service and get your heating system back on track. FAQs About the Gas Valve on a Furnace Below are a few quick answers homeowners often ask about gas valves and furnace performance.

Technician inspecting the burner area of a furnace that supplies heat to the furnace heat exchanger
Heating, HVAC Systems, Maintenance, Repair

Furnace Heat Exchanger Warning Signs

When homeowners ask why their system smells odd, cycles too often, or delivers weaker heat than usual, we usually look at the furnace heat exchanger first. After years of working on heating equipment at C&R Services, we know this component is one of the most important parts of any furnace. Although most homeowners never see it, the exchanger handles heat transfer and protects your home from harmful combustion gases. When something goes wrong, the symptoms can seem small at first, yet they carry serious risks if ignored. What the Furnace Heat Exchanger Actually Does Before you can spot warning signs, it helps to understand the role of the furnace heat exchanger inside the system. This metal chamber separates the air you breathe from the furnace’s combustion process. As the burners create heat, the exchanger warms up and transfers that heat to the air moving through your ducts. Because combustion gases must stay sealed inside the chamber, any crack or breach can lead to unsafe conditions. Technicians sometimes compare this part to an engine block because both hold heat and contain combustion gases. And while that comparison is helpful, the exchanger is actually more fragile. It expands and contracts with every heating cycle, which is why regular maintenance matters so much. If you’d like a clearer breakdown of how the entire furnace works—from ignition to heat distribution—our furnace guide walks through the full process. Common Furnace Heat Exchanger Warning Signs Although no two homes are alike, certain warning signs appear again and again. Because we inspect systems every day at C&R Services, we’ve learned that most heat exchanger problems show up in predictable ways. 1. Strange Smells During Heating Cycles If you smell a burning or metallic odor when the furnace runs, take it seriously. These odors often appear before any visible damage forms. According to the U.S. Consumer Product Safety Commission, carbon monoxide from fuel-burning appliances kills more than 200 people in the U.S. each year. Because a damaged furnace heat exchanger can allow combustion gases to escape, unusual smells or irritated sinuses should never be ignored. It also helps to make sure your carbon monoxide detectors are installed and working, since CO is colorless and odorless. If something feels off, it’s safer to shut the system down and have it inspected right away. 2. Frequent Short Cycling When the furnace turns on and off too often, the heat exchanger might be overheating. Because overheating forces the system to shut down for protection, it’s worth checking. Short cycling can also involve the system’s safety controls, and we explain that issue in more detail in our blog about the furnace limit switch. 3. Visible Rust or Corrosion A rusty heat exchanger is a weakened heat exchanger. Condensation, old age, and poor airflow all speed up deterioration. While rust isn’t always a sign of cracks, it does mean the metal is thinning. A thin exchanger is more likely to fail. How Performance Changes Point to Furnace Heat Exchanger Trouble Even if you don’t see the exchanger directly, the furnace will usually tell you something is off. Weak or Uneven Heat Output A damaged exchanger sometimes prevents the furnace from producing steady heat. Air may feel warm one moment and cool the next. Homeowners often think a faulty blower is the cause, but that’s not always true. Sometimes this uneven heat shows up alongside other problems, which we cover in our blog about why your heater may be blowing cold air. If cold air appears randomly, the exchanger could be involved. Unexpected Noises During Operation A cracked furnace heat exchanger sometimes makes popping or tapping sounds as the metal expands. These sounds aren’t always dramatic, but they often repeat at the same point in the heating cycle. Because furnaces are usually tucked away, these noises can go unnoticed for months. Tripped Safety Devices Modern furnaces include several safety components. When the exchanger overheats or leaks, one of these devices will usually shut the system down. While that might feel frustrating, it’s the furnace keeping your home safe. If the furnace refuses to stay on, the exchanger could be the reason. What Causes Furnace Heat Exchanger Damage Although every home is different, a few root causes appear in most systems. Restricted Airflow When airflow drops, temperatures rise inside the exchanger. Dirty filters, blocked returns, or closed supply vents all contribute to overheating. Because heat has nowhere to escape, the chamber expands too quickly and stresses the metal. Old Age and Daily Stress Even well-maintained furnaces wear down over time. The exchanger expands and contracts thousands of times each heating season. Eventually, metal fatigue sets in. The U.S. Department of Energy explains that older furnace systems typically operate in the 56–70% AFUE range, while today’s high-efficiency models can reach 90–98.5%. Because of that gap, older units face more strain during normal operation, which makes the heat exchanger more vulnerable as the system ages. Poor Burner Combustion If burners aren’t adjusted correctly, flames can hit the exchanger unevenly and create hot spots. These hot spots weaken the metal long before you see visible damage. Why You Should Never Ignore Furnace Heat Exchanger Issues The furnace heat exchanger isn’t just another part—it’s a safety barrier. A damaged exchanger can allow carbon monoxide or combustion gases into your home. Because of that risk, we always encourage homeowners to call a professional as soon as they notice warning signs. At C&R Services, we use advanced diagnostic tools to confirm whether the exchanger is safe to use or needs replacement. How C&R Services Inspects a Furnace Heat Exchanger Our team follows a detailed inspection process that prioritizes safety and accurate diagnostics. We check for heat-related damage We inspect for cracks, separation lines, and rust We test for pressure leaks We verify that safety devices still work correctly We review airflow and burner performance Because we’ve seen every type of heating setup—from older units to modern high-efficiency furnaces—we know exactly where problems tend to hide. When to Schedule Professional Service

Scroll to Top